Thursday 8 December 2011

New Spec two front grill

Well my patience was rewarded and I have in my hot little hands a nice old/new grill! Long may half decent Skylines end up in the scrap yard... As long as they not mine that is!

This was my Holy Grail... Perhaps I should call it my Holy Grill!

It is in amazing condition for it's age and has all the clips etc. in place still. All I thought would make me happy was to be able to obtain a decent Skyline Grill Badge. But as they came with the grill I wasn't holding out too much hope. In the past year I have seen two grills for sale here in the UK. One I have and the other was missing it's badge (although a friend of mine had it anyway). There was another I saw in Australia, although it looked like it had seen better days, having all of its mesh missing (the clips didn't look that much better either).

So here is Nissan Part Number F3210-26U00 in all it's glory!

Elusive Skyline Logo!

Beautiful!
All I have to decide now is if to try and use the whole grill or surgically remove the 'S' logo... Seems a bit awful to remove the logo, paint it gold and stick it on my 'ressurected' grill, no matter how good a job I made of it! You just can't play hard and fast with 'high art'.

However I am pretty much of one mind that is what I will probably do. I have a gold theme going on with the external part of the car now and it seems to work pretty good!

All I need now is to wait and see if I can locate a gold GTST badge for the rear end. At the moment I have a suitably rare GTS-25T badge in black and chrome.. But it's just 'not' right (if you get my drift). So anyone stumbling across this post, feel free to drop me a line!

Is it me? Or is it hot in here??

Lamborghini Miuras have a certain something. i suppose this falls under the heading of 'So cool, it's hot'

Isssss my Birthdayysssss

Heh, I came over all Golum for this post. Well, it's not my Birthday (or even birthdayyysssss'es) but I do have a lovely package, cunningly entitled 'Happy Birthday' from Japan.

I often wonder how stupid Customs have to be to keep letting these packages through. Admittedly I an a bit vague on the law for import of car parts (although customs did charge me a load on cigarettes before!). Additionally with the strong Yen at the moment I don't think many of us are at all keen on buying from Japan. But I suppose as long as they keep on coming I will keep having 'Birthdays'.

And the content's of said package?

Well not all that exciting to most, but to me a big deal. This is another Spec Two Wire Mesh Grill. However with one important difference over my existing one, this is immaculate and perfect in every way! I also managed to get a 'normal' standard Spec 2 grill in white included (if anyone wants one!).

the only thing that worries me about this new grill is that it is so perfect! I didn't mind working on a tired worn out one as there was nothing to lose! But to mess up on a perfect one, well, to me that would be like touching up the Mona Lisa with poster paint! Still I never was too bright when it came to things like this and 'in for a penny, in for a pound' as we say in the UK. Let's see what art I can create!

Tuesday 29 November 2011

Braided fuel hoses


 As alluded to in my last post. I have been going braid crazy! As you will see in the photo's I have over braided the top breather pipe (to keep it's shape) the fit is close to the oil cap but it just about clears it.

The un braided 'top pipe' will get the treatment this week as well and I will have two end connectors mated together. Am just awaiting the parts.


U shaped breather and down pipe, top pipe to finish

The fuel lines were easy to do and apart from not tightening the one connected to the filter enough (oops) was a pretty uneventful task! I would have liked the end finishers to have fitted a little tighter and if your doing this at home I would suggest a small amount of electrical tape to increase the outside diameter of the pipes. Although this isn't really important and I can live with it.

Fuel Lines
The most annoying thing I could manage was to drag the braided hose over my engine damper and remove a small amount of paint from it! Luckily I had intended to work on this a bit more anyway, although I didn't expect a repaint so soon! 

Monday 28 November 2011

The reason for pipe work..

I have been working pretty flat out lately on the car, well perhaps 'flat out' is pushing it a bit. I have been working on and off a bit on the car lately. Getting it to the theoretical 'finished' state, yes I have 'in my mind' a finished state for the car. The point where I say 'it's done'!
Anyway per my previous post about silicone pipes and hose braiding.. My good friend 'Dal' sent me a picture of the engine bay just after it had been completed by Serious Performance Autos.
Handy as I didn't take a before shot to compare with the after! You can see here that the only hose available at the time was in a rather fetching 'blue'. I include it not only for the the 'reveal' pictures of the finished item but also for your entertainment and delight!

My slightly suspicious blue 'sex toy' attachment in engine bay.

A Braiding we shall go!

Now I don't have anything in particular against silicone hoses, in fact I think they are good alternative replacements to the existing hoses when needed. What I don't understand is their use as engine dress up items. It seems to me that no matter how tired, dirty, worn out looking peoples engine bays are, the first thing that most people want to do is fit a silicone breather pipe set to it, usually in some awful colour (it seems that the colour 'blue' is too common), like bright green, lurid purple or orange red! Of course it does not help that usually folks on a budget seem to get their pipes a few at a time, like buying a breather set and then the radiator set. This often leads to the 'almost but not quite' school of matching colours. As a further aside you seem to pay a premium for silicone pipes if they have the makers 'logo' inscribed in huge while letters, professing how sporty they are! Of course the real irony of the whole situation in designer pipework is that the most elusive of the colour spectrum appears to be good old honest plain 'black' pipes! (Not that black is a colour, depending on what arty types you know).

I myself (being of a certain age) still like braided hoses. These were all the rage once and an Escort XR3i would be instantly raised a level by having a bit of braiding chucked under the bonnet. Now for all of you who cry out 'old hat' at my reminiscence, I say to you 'retro is in!'

My only problem with braided hoses is that I have never purchased any before. Where do you get them from and what size etc! It is then that it really becomes clear why people like silicone hoses!

Having had a look around braided hose comes in various ways. There is the straight forward inner diameter that you require hose, that is already braided. or there is over braid. Over braid is a bit like a sock that fits over your existing pipework, you can push it together to open it up and feed your rubber pipe through and then pull it tight over the pipe, the braid does all the work then. I usually use tin snips to then cut and trim the braid itself.  
The pre-braided pipework is somewhat easier and just needs to be cut to length. This can be done most effectively by wrapping electrical insulating tape around the braid and sawing it with a fine toothed hacksaw.

Now the actual fitting of the finishers can be a pain, as they are push on but with a jubilee clip built in. This would be fine but they are somewhat a tight fitting push on and can catch the braiding pushing it back! I usually clean up the cut end with my trusty tin snips, wrap electrical tape tightly around the end and tease the finisher into place until I can give it a firm push!
Naturally the wire of the over braid is annoyingly sharp and can fray like crazy, so it is good to make sure that it is tight over your pipe before mucking about with trying to push the end cap on!

For the technically interested, hose and finishers are listed by their 'AN' numbers. For instance 16 mm ID hose and finishers would be AN12. Whereas fuel line is AN6.. Although to confuse things... AN6 seems to apply to 8 mm ID and 6 mm ID. So check what size hose you are getting!

It is a bit of a pain to find one seller that does all the parts you would need for this. Although I have found this supplier Torques UK to be the best.

Now as I have this rather wonderful turbo from HKS fitted to my runabout, my pipework is marginally different and the rocker cover top breather hose is somewhat rather longer than standard. Originally I was going to do away with the Nissan 'bent' pipe connected to another pipe for one great long pipe. This isn't really practical with over braiding though as the silicone flexy pipes that you can get are just too fat to braid properly. Therefore I decided 'what the hell' and am going to connect one braided pipe to another.

AN6 pipe and finisher.

As to how it looks on the car. Well it's looking promising... I don't have any photo's as yet (not finished) but will post 'this week' when I have done. Okay to be honest I needed a couple more connectors (which are on order).

Thursday 24 November 2011

R33 Engine Damper - review

A very popular 'modification' or addition to the engine bay, seems to be 'Engine dampers' the idea of this is, simply it will stop your engine 'moving' about under hard driving conditions and improve the life of your engine mounts.
Also but probably of less importance to the the average user, it also provides some dress up for the engine bay!

As you can see, the kit consists of a couple of brackets, a damper and a couple of screws. The brackets come in what looks like a nickel plate finish and whereby the finish is acceptable, it isn't of the first order. However they are quite passable. There are two brackets, the larger fits to the left hand suspension turret top (requiring your Strut brace to fit over the top of it) and also to the earthing points next to the fuse/relay box. The smaller of the brackets replaces the engine lift/hoist point.
Fitting of the engine bracket is a little fiddly as access isn't easy for bolt removal. This is increased when fitting the new bracket due to the rib that runs down it's center. However it can be done.

The damper has two rough cast ends (which you may want to clean up before fitting) and an anodized body. Usually supplied in red or blue, my example was not well anodised and it seemed slightly patchy on colour. I masked up, primed and painted mine in body colour before fitting.

The screws are zinc plated items.

When fitting (as mentioned) the screws can be a bit of a pain to do, in fact I found the harder ones were the ones located by the fuse box. It could also be said that if I had not been so lazy as to not move the fuse box out of the way beforehand, this would have been a simpler task!

The actual fitting of the item is good and it slots straight in. The unit comes shipped with no instructions or blurb.

Does it work?
Well 'they' say that fitting this to your car you will:
Reduce engine vibration, increasing horsepower to the flywheel as torque reaction is minimised.
Give a smoother, more linear power delivery through the transmission and to the rear wheels.

I say that the above statements are probably big claims, although I'm open to try them out!

Wednesday 16 November 2011

A catch up!

Well, it appears that one thing quicker than Ms Skyline is time. I can't believe that we are rapidly approaching the end of the year. Mind you 'time' itself in terms of a 24 hour day, is an abstract concept I suppose and with my main turbo pipes at the polishers it seems to be taking 'forever' to get them back!

So pockets empty of cash and the economic climate also empty of cheer. We can all amuse our selves of the fact that Christmas rapidly does approach!

So to the car.. It has not sat idly by lately (as if I could stop tinkering). After completing the paint work on the slam panel and whilst the car is laid up STILL waiting for the pipework. I have indulged myself with some other works cosmetically enhancing her already good looks.

With this in mind I took a deep breath and started to work on the front splitter. This will be it's third clean up in a year so far (will get to that). Although the last time it was sprayed it was a rush job of a not very high standard. This time around I was determined to take my time and get it right!

Will not bore you with the photo's, although the finish is to a very high standard. To protect it from the dreaded stone chips I plan to vinyl coat it. Not decided on quite how yet, or if it is a job for me, or for someone that actually knows what they are doing.

I also removed the front Spec 2 Grill. Even though previously I had made do and mended, I was not 100% happy with the actual finish. I decided to 'man up' and completely strip the layers of previous owners paint back to the plastic and do a 'real' job of it. I can confirm that I must be it's third owner as my black coat of paint when removed revealed another black coat of paint and finally a gunmetal layer of paint.
The hard part about getting the paint off was really getting it out of the tight corners and I spent most of a day with a set of small needle files picking paint out.
Finally I was ready to paint and ironically I used a filler primer to smooth out the finish of the plastic. I was so pleased with the results, I then turned my attention to the actual wire mesh of the grill itself. As you can also see below the 'S' logo was also worked on pretty heavily. It isn't perfect where the previous owner was an idiot. However it passes my high standards!
The logo was also stripped back and painted (Tamiya Gold)
This is of an all in one design, consisting of a frame, with mesh attached. As the top of the frame actually is on show when the bonnet is closed, it was pretty important to keep this. The wire mesh is made of steel and is quite strong, also being (for mesh) quite large. I decided that I could use some Ripspeed Stretched competition mesh at £24 it wouldn't break the bank etc. This is of Aluminium construction, so rust will not be an issue. It is also quite thin, so cutting it to size would be easy.

With the old grill I chopped out the old mesh with some tin snips. The mesh is actually spot welded to its top frame making this a one way only deal, so it was just a bit scary. I then just counted up the 'holes' in the mesh and cut out a long strip of mesh. I did think about being scientific about cutting the angled ends etc. But in the end I simply held my strip along side the grill and 'chopped away' with a steady hand. Okay so the first attempt was crap! However the second was spot on and happily you get quite a bit of mesh to play with.
I did leave some of the old mesh (where it was spot welded) in the top of the frame, straightened it out and then after fitting the new mesh, bent this back to hold the new mesh in place. I secured the lower part of the mesh in place with body kit glue (just a bit!).

Finished product!
In some strange way cutting the mesh was an enjoyable task, each length requiring two snips per 'mesh hole'.

There's a fair bit more I have been working at and I will be updating as I catch up!

Thursday 20 October 2011

Slam Panel Part 3 - The Revenge!

Well no, it did not have a revenge on me, I think I have possibly seen too many Jaws films. Although saying that Ms Skyline can sink her teeth into my knuckles now and again!

Continued work on the slam panel today. Flatted back the nice new shiney paint with 1200 grit, even though it wasn't the recommended 24 hours since spraying it, I decided that this was more of a guideline rather than a hard and fast rule... I can be patient... Okay no I wasn't!

It did make me slightly nervous to flatten all of my beautiful black gloss, but hey ho, in for a penny and all that. So after the regulation two minutes shaking I applied two coats of clear laquer leaving 15 minutes between coats.

The finish (for me) is lovely... Although it's very black compared to it's surroundings, this will be fine when all the bright work is replaced.
Finished Slam Panel

I also worked on a couple of the nasty galvanised brackets and sprayed them with a special plastic finish paint. This is textured and dries a matt black. I used this as to get a good gloss finish is a pain, I also thought it would be a good contrast with the (now) high gloss finish.

Plastic Effect Bracket

Whilst on the subject of bright work, I have been experimenting with some 1mm thick rubber and plan to mount this under the fittings of non important parts to save my nice new finish from excessive marking.

Tuesday 18 October 2011

Slam Panel Part two..

Painting... It drives me nuts! Really!

Okay rant over.. Mini rant that it was. Smoothed off the prime coat this evening and gave a generous blast of black KH1 Kuro Black. Reasonably pleased with the results there are a few 'pin holes' where there is probably contaminants on the surface, but not enough to make me want to sand it all off!

Tomorrow will be the brown trousers. I will give the paint a light sand with 1200 grit to Matt it up and then apply some clear lacquer. This is the bit that is easiest for me to mess up as it's hard to know where to stop with the lacquer!

Here's the work so far... Just looks like a lot of black to me! It's there, honest!


What else did I achieve tonight? Well I have had delivery of a couple of black silicone coupler pipes. I must say, I like, I like a lot! I was thinking perhaps to replace a few more whilst everything is out of the car. However it is a pain to order sizes or for that matter measure sizes, especially as all the pipes are off the car. The only other thing to foil my plan for all couplers to be replaced is the fact that one coupler is buried under all the brown paper shown in the picture...

One other thing I may conduct an experiment with is braided hose. Well, self braided hose to be exact. You can buy braiding to cover existing hoses, it looks a bit of a Devil to do though, in fact the more I think about it the less I want to do it. Will put on my investigating hat!

Painting Heat Shield and Slam Panel

So I have dived straight into work on the final touches for Ms Skyline. After detaching all the pipework I removed the heat sheild from the exhaust manifold as this was letting the side down with it's unattractive looks. I have been warned about painting this as the paint can 'crack off' and would leave it in a worse state than it started. Although I beleive that this would have been if the part was painted in 'normal' acrylics, besides the heat sheild is already painted in silver, so what the hell. I naturally went for a rather fetching shade of black (what else!) High Temperature paint. I can't see me having problems with this although time will tell! I also replaced the three bolts along the visible edge on the top of the sheild with Stainless items. 

If you look to the back of the picture by the turbo, you can see the lovely stainless HKS heatshield plate of the 2835 Pro. The temptation is to infill the backing to the logo in black, although I must resist! 


I have also started work on the 'slam panel' at the front of the car. I know to do it 100% proper I could have removed the fan and headlights. Naturally I have gone for the easy option here! Sorry to all purists out in the world!


No, I'm not going for a fetching shade of grey! This is just the prime coat, the finish will be just plain boring black, the same as the car. Naturally I want to get this out of the way as quickly as possible, with as little mess and fuss as I can get away with.

Monday 17 October 2011

A Win of sorts..

Well Ms Skyline is back, alas not without a healthy dose of drama! What should have been a straight forward job soon developed into a pain in the butt. I dropped the car into the garage on Saturday morning, the plan being that the work would be done and the car on the dyno by Friday. Wednesday and the first problem reared its ugly head in the shape of a cracked exhaust manifold, this was a real problem as where the hell could a new one be sourced. As luck would have it the garage knew of a used item that could be purchased for £50 locally. Result then and drama avoided. Oh that it were, the replacement manifold was warped and would not fit. Giving the garage it's dues they managed to source another from JDM garage, these are probably the most expensive and unreliable source of parts in the UK. True to form they wanted £86 for the part, although I was desperate so would have probably said yes to anything at that point. Giving JDM Garage their due's they did come through and had the part at the garage next day. Although I would still suspect being 'the man in the street' and not 'the garage'. I would have had a slightly different experience.

So with new 'old' manifold, turbo and camshafts fitted the car went to the tuner...

Naturally this didn't go well either and a decent tick over could not be achieved. To cut the story short, the garage had fitted a R34 camshaft to my R33 (approx 1.5mm extra lift).

Now I can accept a mistake, although everyone seemed to point at everyone else. The garage were not happy and I got a distinct vibe that they were upset at having to do the job again. Personally I can't see how I would have been at fault here, as for once, all I did was pay the money, leaving sourcing of parts to them! The garage said that the wrong camshaft was in the right box. Well it could happen...

The correct camshaft was promised for the start of the week. I heard nothing, nothing and nothing. I asked when the car would be going in and was told maybe Thursday. happily this happened and the car did its thing. I took Friday off work to collect her.

I will come back to the tune etc. in a different post.

The car was unhappy cosmetically under the hood. For some bizarre reason I had beautiful bright blue pipework! What the worlds obsession with blue silicone is I dunno, but it has to go! Where the heat shield fits there are two new bolts and the slam panel had been drilled badly to fit these (can only assume the original bolts were lost). There were plenty of scratches on the slam panel too, the bracket to hold the air filter in place was loose, the Strut brace had been tightened by the bionic man, cracking the powder coating both sides and the new pipework for the turbo was looking a bit tired.

So it's all action again in another lurch towards the finish line. I have prepped the slam panel for painting, removed, polished the pipework, removed the strut brace pending painting and have some silicone black pipes and clamps on order.

Have yet to decide anything, I may send the pipework to chrome, if I do that then I may as well do the strut brace at the same time and get the end's re-powder coated. The silicone is on it's way, although I really need to finished the slam panel. The car's tax is due although possibly I will put this off a month and just forget I own the car a bit!

Think of this as an interim post.. whilst I work out what to do next!

Tuesday 13 September 2011

Once more unto the breach, dear friends...

'Once more unto the breach' - is from the 'Cry God for Harry, England, and Saint George!' speech of Shakespeare's Henry V, Act III
Why? You may ask is yours truly quoting from a battle where
the breach in question is the gap in the wall of the city of Harfleur, which the English army held under siege. Henry was encouraging his troops to attack the city again, even if they have to 'close the wall with English dead'.

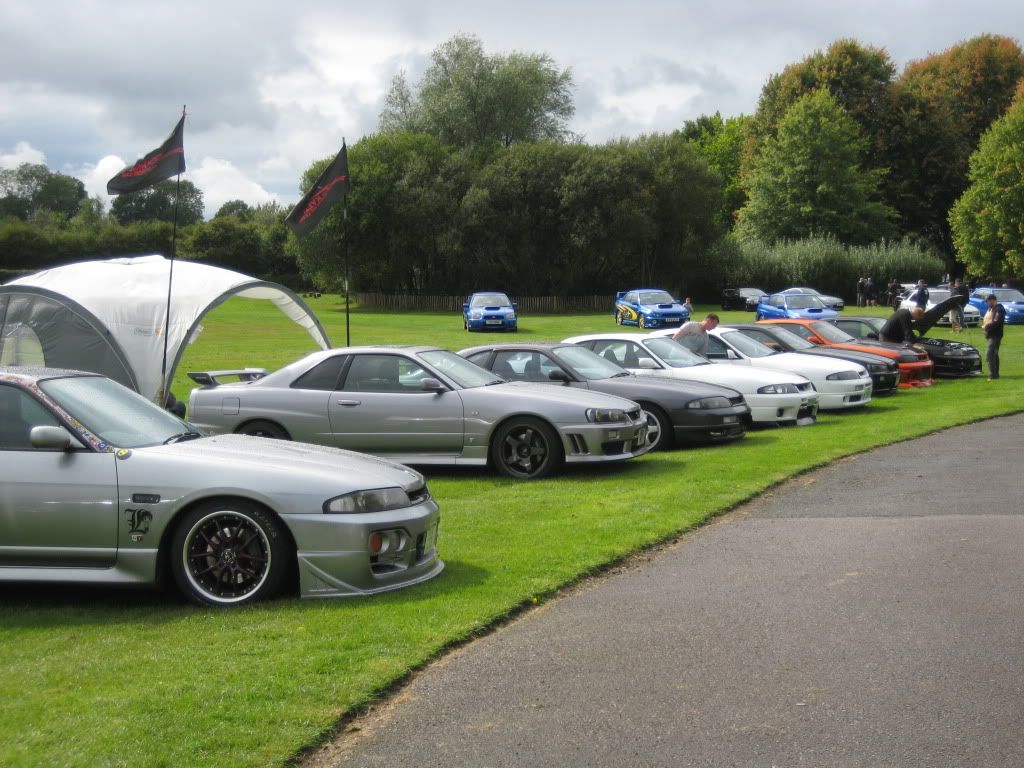
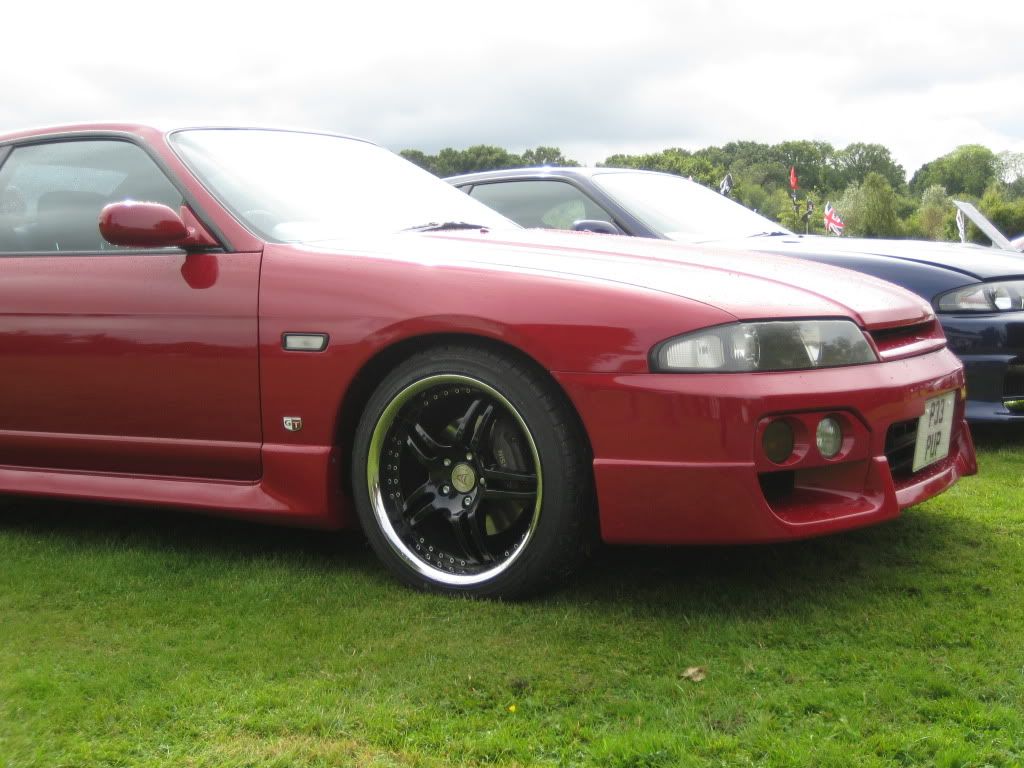
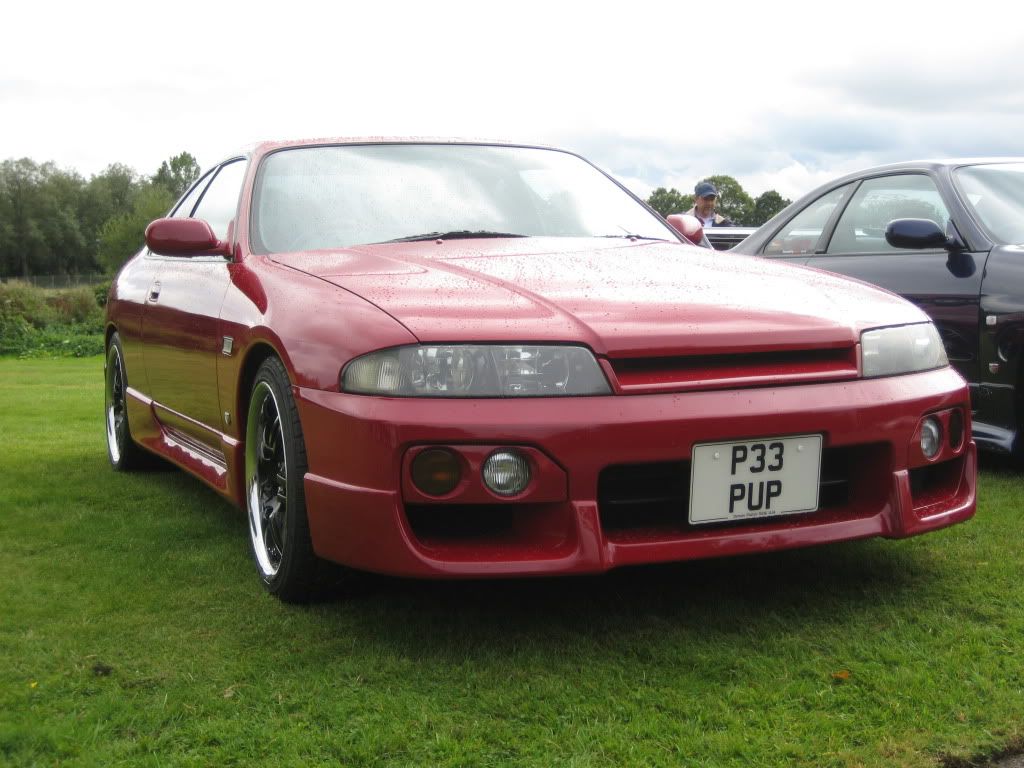
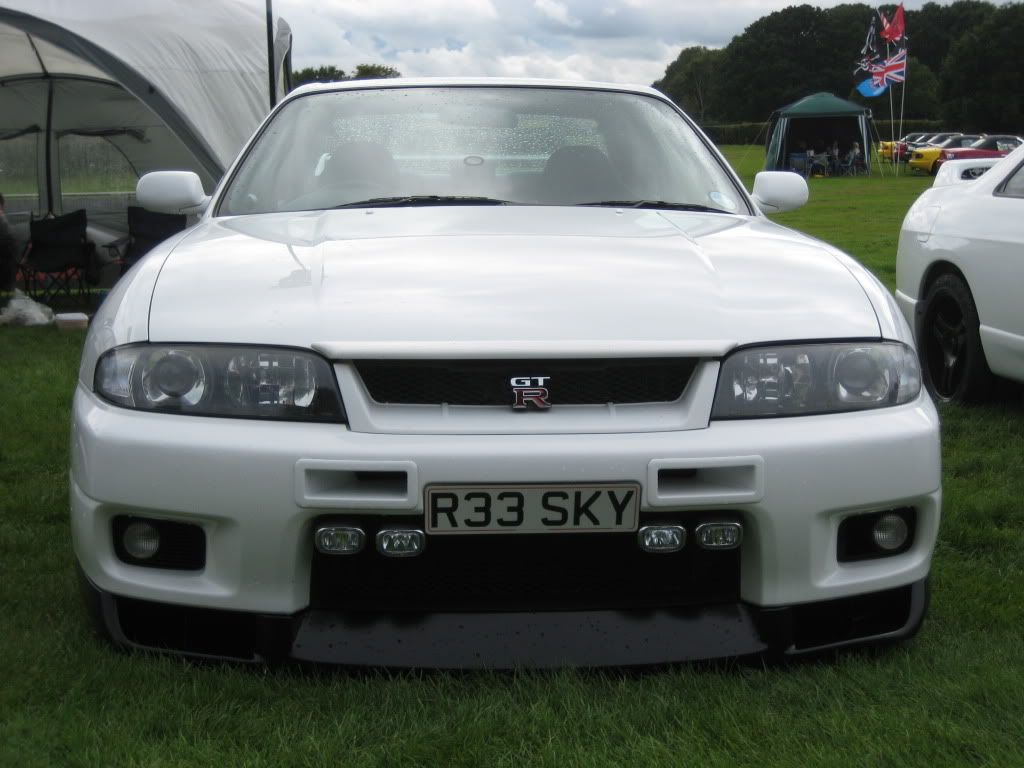
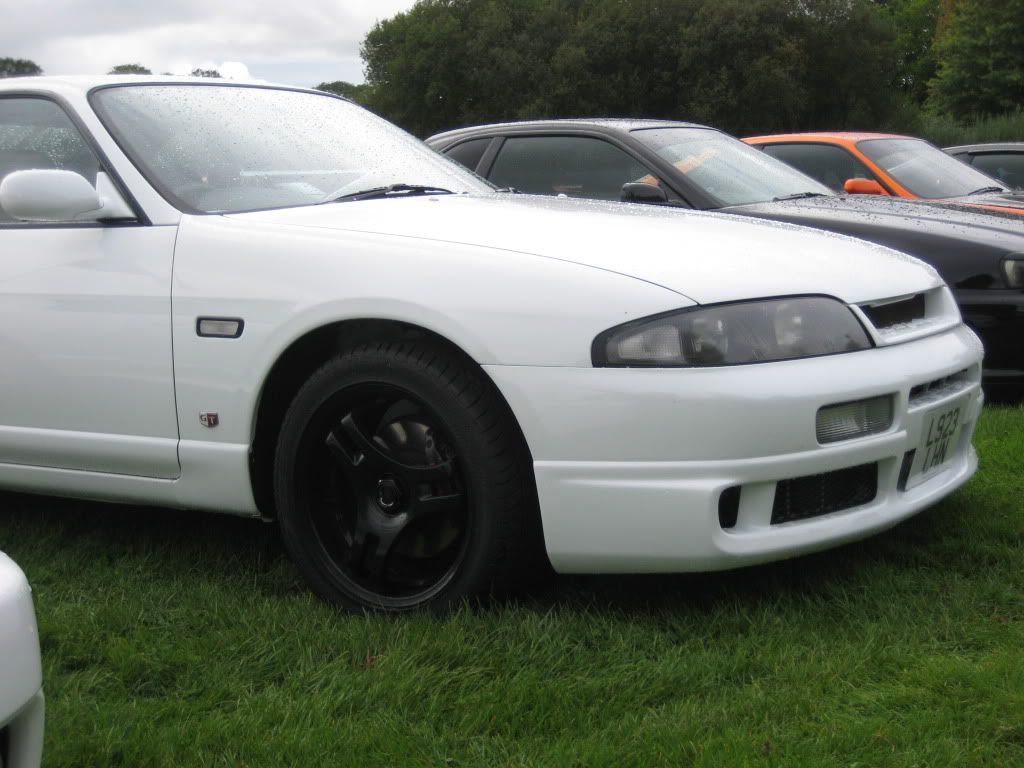
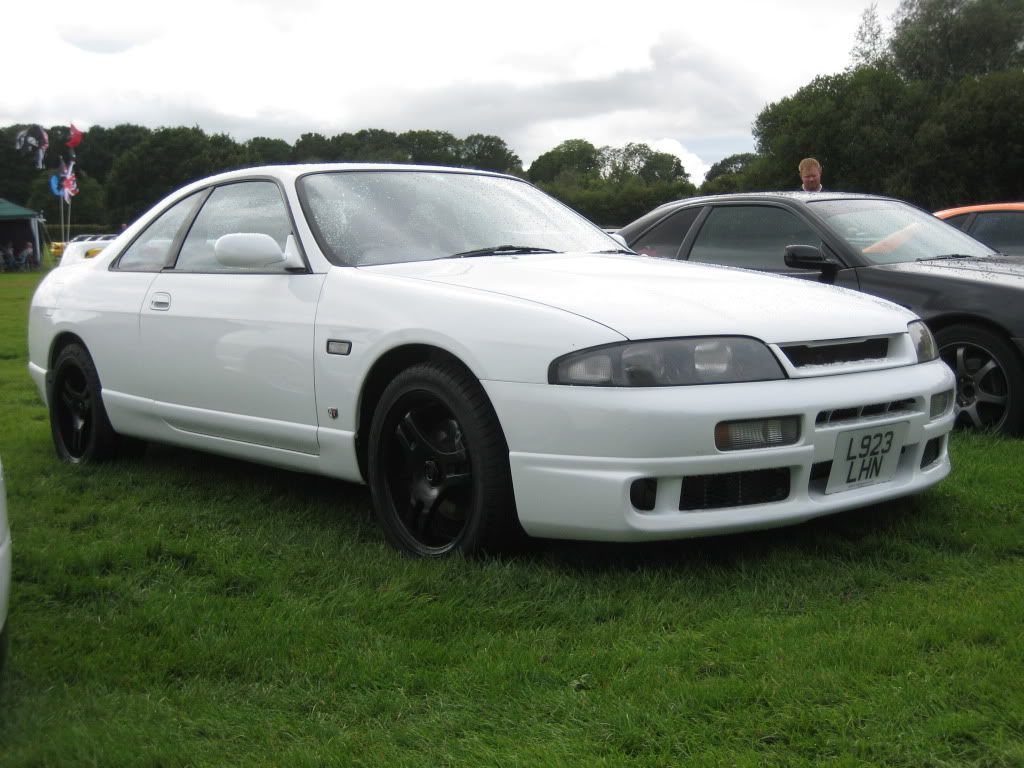
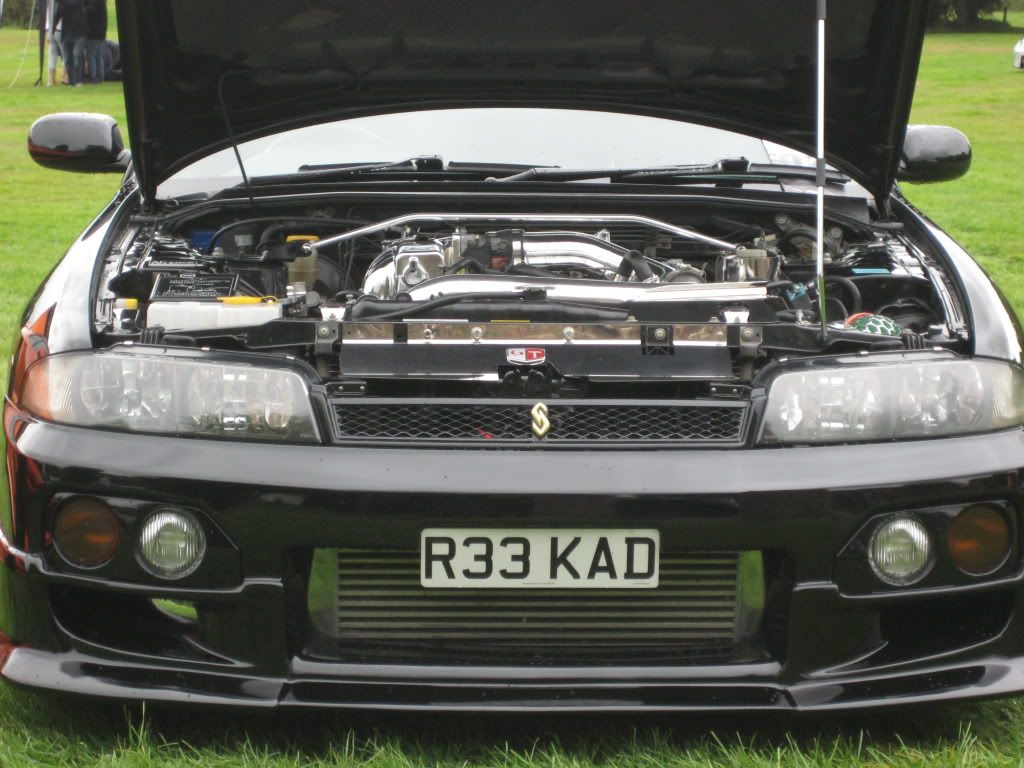
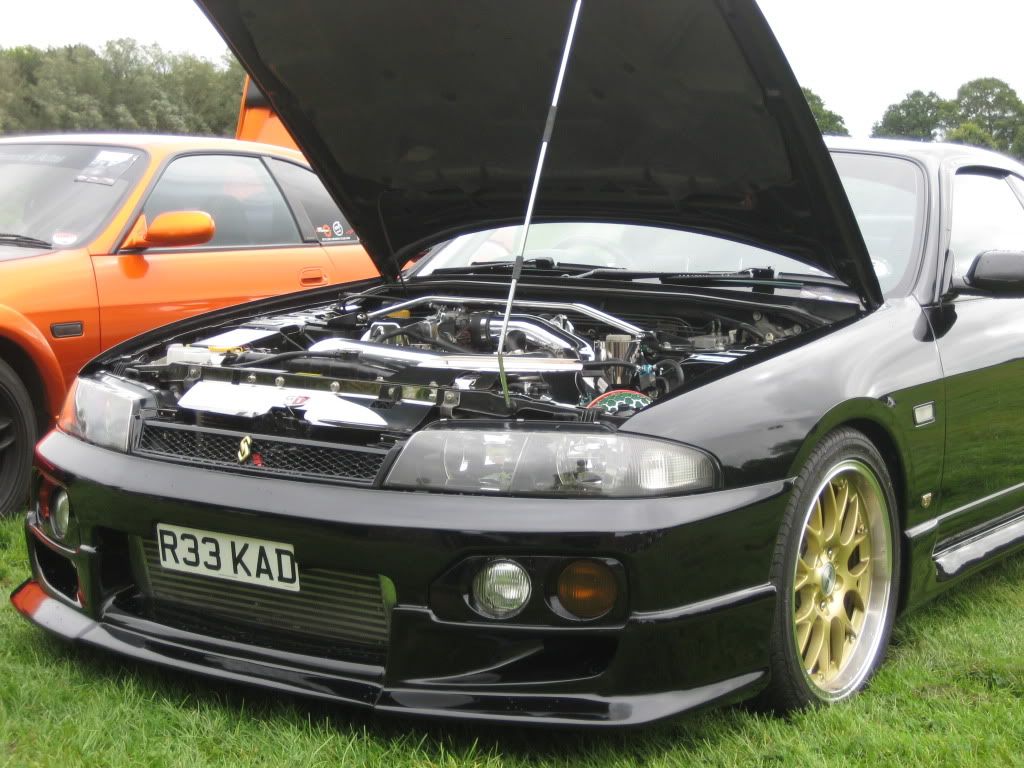
Well it has been a long old expensive road that me and Ms Skyline have battled along. She is after all a lump of metal, not capable of independent thought, just a concept perhaps in my own minds eye. Now we reach the end game, final modifications to her engine. After this there can be no more internal jiggery pokery and she will be all she can be.

Lets look at the bits that are going to be fitted.

Tomei Pon Camshafts

Originally I would have gone for HKS, although for some strange reason HKS UK don't seem to sell parts as such. Just key rings and basically dumb parts. Pointless in my opinion and am not sure why they have a presence in the UK at all.

Changing camshafts help to modify the torque characteristics of an engine by changing cam duration timing and height of the cam lift, there by gaining maximum torque and horse power.
However, when tuning the engine strictly, it should be carried out with the idea of securing effective area of the valve not only by duration timing and height of the cam lift, but also by through improvement of its intake efficiency.
High valve lift will allow huge amounts of air to flow in, yet it can mechanically damage the system and will gain friction loss. Also, wide cam duration will deliver great power at high RPM, but it gives rough engine character at low RPM too.
Tomei have worked to get an ideal well-balanced profile of camshaft and succeeded to give it 1.3 to 1.5 times more effective area than regular camshafts.

Nissan - Skyline - ECR33 - 8/1993-9/1997 - Duration: IN,EX 256 Lift: IN,EX 8.5mm

Reading a few sites I wonder if this modification is really going to make a hell of a difference. Although the user forums usually all conflict with each other on just about every subject, so it has been rare for me to ever take the advice given and usually go my own way (as in this case).

Nettie @ Serious Performance Autos
tel 01323 760076
This is the only car modelling that interests me, a lovely lady holding an interesting lump of metal!
HKS Turbine - GT2835 Pro S


The HKS GT Series Turbos are based on ball-bearing Garrett units and have re-engineered compressor and turbine wheels along with specific A/R and trim levels.
All GT Series Turbos are designed to be a perfect blend of power and response. HKS achieved this balance by first choosing to use a ball-bearing center cartridge to reduce friction along with an off-center turbo design for improved efficiency and flow.
HKS carefully tested Trim and A/R levels along with different inlet and outlet diameters to achieve optimal power. The results of this combination are turbos that not only deliver amazing power, but also spool incredibly fast.
HKS GT Series Turbos are offered with a GT25 (T25) and/or T3 footprint and the turbine wheel is constructed of inconel. Inconel is a very expensive material that can withstand extremely high temperatures and is typically only used in the aero-space industry and on race cars.

HEL Performance Automotive Brake Lines & Hoses


HEL Performance specialise in the manufacture of all stainless steel  brake lines and hoses in over 65 countries around the world.

With over 5,400 stainless steel automotive brake line kits and a large range of oil cooler and stainless steel oil line kits we are sure there will be something in our range for your car.

The most powerful part of your motorcycle is not the engine - it's the brakes. That's a fact! By fitting HEL Performance Stainless Steel Brake Lines you can make them even more powerful!

Can't beat a 'real' photo!

So, there you have it. Camshafts and Turbo. And brake lines thrown in just for the hell of it (or hel of it! lol...).
The car will be in the garage from the 30th September. Not long now...


Monday 12 September 2011

Nismo Oil and Radiator Caps

Well not a lot to report on these... Will call them screw on mods!

The oil cap came with a nice protective plastic cover over the NISMO badge, which also had a sticky back so it could be placed correctly.

I don't quite know why, but I hesitated before going down the Nismo route for an oil cap. Now it's fitted I don't quite know why I was bothered! I think it may have had to do with seeing such ugly (yes I earned the right to say it) engine bays with this random bit of bling attached.. And judging by the quality of this to those that I have seen I have to say it, I have seen a lot of fakes!

Anyway, working arse about face. I first took the car out for a spirited drive.. So I could get the Oil cap nice and hot. Plus the water well up to boiling... Am sure sensation will return to my fingers any day now :)

Check out the photo's, I think fitting directions are not needed.


Sunday 11 September 2011

It's dark and I'm wearing sunglasses

Well today it started out with me thinking I would clean my wheels and then get on with housework.. This great plan soon got forgotten as I washed the whole car and pampered it with cloths soft and gentle!

I compounded this flaw in my character by then taking the car out for a drive with no direction in mind. I ended up in town and tried a couple of photographs by candle light. It is very difficult to get a decent result with a crappy small digital camera as the flash bounces off everything!

Here are my results...

Nice British Lamp Post

Well it kind of works!

Flash is hopeless.. Will stick to my day job
Anyway, as a result of cleaning up my kitchen I managed to liberate a 'trolly' or interesting set of shelves on wheels. This was left by a previous Mrs Ratt and was home for all the things you use to wash clothes...

Now it is much better used and I keep my few meagre cleaning products on it.

Not as much as most people think!

As you can see I like a bit of Auto Gylm for polishing and waxing. Although like most people I use combinations and won't even begin to bore you with details. Having a black car I naturally have further travel to get what I call a decent shine. Again, car cleaning is personal, it's what works for you.

Saturday 10 September 2011

Iron Tusk Fitted Side Skirts and Rear Spoiler

As alluded to the other day. My good friend aka 'Iron Tusk' has been a busy bee..Not content with changing his front grille for a lovely rare version, he has also been modifying the bodywork, fittings skirts and spoilers.

It was in the early days when I myself fitted skirts, spats and a front splitter to Ms Skyline. Although I did so many things all at once I was practically non stop in those days (and loving every minute). So it's refreshing to see others being bitten by the bug!

As it was so fresh for him I asked if he would provide me with a little info on the snags and problems or otherwise of doing the job..

Interestingly he did provide a narrative of sorts and probably an honest reflection of Skyline ownership in the UK. I provide it here unchanged for you all to enjoy...

Quoted from Iron Tusk

It would consist of;

•Get ripped off by a breakers

•lots of swearing, splitting boot lid from spoiler

•Pay through the nose for paint

•get angry when the original spoiler takes like 2 seconds to remove

•Fit with some difficulty in the impending darkness

•not be able to photograph\appreciate your hard work...

lol :-)

To be brutally honest I think probably we all have felt this after major work, although it is later that we start to appreciate how good the car looks and what an achievement that has been made.

Type M Skirts

Original GTR Spoiler

Bragging Rights in the dark
Without doubt, currently and without an ugly overblown FRP monstrosity bolted on the front and sides. This has to rate as one of the better looking R33's on the road. Many congratulations to Iron Tusk for creating 'Automotive art' its a thing of true beauty!

Thursday 8 September 2011

Skyline Battery

Skyline R33's come with the worlds smallest battery which is located in the boot of the car.
I confess that with my considerable lack of knowledge starting out, it took me a while to figure out where the battery was and even then when I did locate it I thought 'huh? That isn't right. Is it?'
The battery itself is the same as that fitted to a Nissan Micra, noting that this is the small terminal version. For UK Replacement click HERE for the Halfords site.

Naturally you can replace the battery 100% and go for something a bit bigger, although do bear in mind that not only must it fit the space available, but you will need to change the terminal connectors for bigger ones.

I have not gone down the road of changing mine as yet. I may do it when the existing battery gives up the ghost, although I do not have a huge amount of in car entertainment to really suck the power out of the car and we shall just have to see what the winter chucks at it.

Originally my battery was starting to play up though. It would hold a charge for about a week, after which you really needed her to start 'first go' and even then it was a bit of a struggle to turn her over. As this was before I had looked up what battery to buy etc. I wasn't sure on what to get.

As it turned out I 'stumbled' across one of these CTEK Zafir 90. Alas this has since been replaced by the 3600 version, although at time of writing both are readily available on the open market. Personally I can't see much difference between the two and would go for whatever floats your boat.. or is cheaper ;)

charger can be located anywhere

Handy battery connect means no messing about
The unit is quite small in comparison to 'traditional' battery chargers. When you first see it you think 'that isn't going to do anything!'. But hey I'm an optimist so thought I would give it a go.
Naturally all you do is plug the charger into the mains and off you go. You have a handy plug connector that fits to the battery terminals, this makes connecting a breeze which means no more fiddling about with clips and sparks!
The unit not only charges but also conditions the battery. It can be left plugged in for weeks without damaging the battery and it actually has made my battery come back to life! Being able to leave it plugged in also means that the alarm can be set etc. The setting of the unit is also simplicity, press the mode button, highlight the 'car' logo and your done. the unit will show an amber light for charge and a yellow light for fully charged.

A manual is available from here

Having used this unit for a while now I can confirm that it does 'what it says on the box' and I have not had any issues with low charge since.

Tuesday 6 September 2011

Rear Spare Wheel Cover and Extinguisher

As mentioned, I have been keen lately to have a fire extinguisher in the car and I have seen too many infernos this year to let it alone anymore. It may be that I'm a bit superstitious but to ignore what is a simple modification would be heart breaking if the worst happened.

Fire Extinguishers come in a few flavours. Most are too small to be of any real use, having less than thirty seconds of powder. I decided to invest in as best I could and obtained a 50 kg unit, suitable for all fires.
The only problem with this is that it is going to be a Devil to actually mount in the car.

Naturally my first and only choice of location was the rear boot area. It was not feasable really, to stand it on end upright and would have to lay on the floor. Screwing into the soft carpet would simply not hold it in position and I didn't want it to cause access problems for the spare wheel.

As posted previously I had already decided to make a new cover for the spare wheel using the left over from when I made the speaker housings. As this simply drops into place I also made an additional shape to sit to the left of the cover.
To hold this in place I used some velcro. Strong enough to hold in place and yet removable with ease.

Plate made for fitting Extinguisher

This was simple enough and keyed perfectly with the new shelf. Finishing was not really a problem as this part will never actualy be seen.

New spare wheel cover in a leather cover.

The shape for the wheel cover I 'covered' in leatherette with some spray on glue. I really could not be buggered to make an immaculate job of it and confess I tided up the edges with Duck Tape.

Spare wheel cover drops in

The most ideal thing about my terrible covering of the bare wood is that it cushions the shelf perfectly eliminating rattles.

Finished product with extinguisher fitted

After dropping the cover back in, it was just a question of dropping the carpet into place.

Job done!

Iron Tusk's (project?) Car

Iron Tusk's GTST Sporting a new nose
here is a shot of a friend of mines Spec one GTST. He has made slow but steady progress on it. As the car looks so good it would be almost criminal not to celebrate it here. This is after fitting one of the more highly sought after mesh front grills. It is amazing how on Skylines (especially all GTST's) the grill is the most important part of the car. Nissan (in my humble opinion) got the standard grills soooo wrong and then tortured us by getting it right. Only for them to say 'nope, we don't make them anymore'.

Oh and by the way, I am still in the market for a Spec 2 mesh grill S badge. If by some chance you have one of these items (standard colour they came in red). I would dearly love to make a mould of it to reproduce it for my car. Or better still buy it from you.

Current Project that no one will ever see!

Ms Skyline came complete with a hardboard spare wheel cover in the boot. At some point, something... nasty has leaked in there. Be it cooking oil or I don't like to think what. Anyway as you can see it is a most unpleasant piece of bent old wood. I have now commenced making a new one from the left overs of the MDF I used for making the speaker surrounds.
Naturally the humour in doing so is that most people remove weight from their cars whereas I always seem to be adding it! :) I will be attacking this mini project this week and hope to post the finished product shortly... Also there is a more practical reason why I'm doing this, which is that I need somewhere to mount a fire extinquisher (I have seen three Skylines burn this year and don't plan on being the fourth!)

Manky old Nissan offering.

Jap Bash 2011 Bentley Wildfowl Trust

Held on the 4th September in the wilds of West Sussex UK.

After an early start I actually went out to Eastbourne in West Sussex to meet up with other members of the Skyline Owners Club at Serious Performance Autos. Alas they were all locked out of the unit and standing around waiting for someone to open up. As always no one was really talking to one another so I decided not to hang about and made my way off to the show.

Unlike the previous year there was little of interest (apart from the cars) to do this time around. There were no traders present or interesting displays. I myself was directed to park, prepared the car, opened the bonnet etc. Only to be told that where I was told to park I should not be parked.. Hmm, it would not have been so bad but the chap telling me to move was the one that told me to park there in the first place.

Anyway once that was sorted it was time to relax and enjoy the show 'proper'. Ah yes but what about the weather? Well the sky's opened up and we had a sustained downpour from 12:30 to 13:30.

A lot of people started to clear off early at this point which was a real shame as it killed the show.

Bentley do have a motor museum, although perhaps its me, but I found the presentation and exhibits a bit of a joke. The only cars of real note to me were a Dino and a Audi Quattro.
As for the 'wildfowl' part. I did not actually look at any birds so I can't comment. I'm sure that they were lovely.

I spent some time on the Mazda MX5 Owners Club stand. They are a remarkably friendly bunch and this group went under the name of 'Bucaneers'. I have always liked the MX5 as a car, perhaps the social side will tempt me even more, as it can be a lonely life owning a Skyline (awwww).

Lets do the picture thing!


The depleted ranks after the rain
Mandy's car AKA Pupsy

Pupsy and PK GTR's You can just catch a glimpse of Peter cleaning away in the back.

Sticker blitz on this one, apparently not a genuine Transformer though.

Nicely done R34

Interesting cutting for the Front Mount Intercooler.. What can you say!
This GTR was a perfect clean example. Note the driving/fog lights. These are genuine Nissan items and wire straight into the loom. Love them? Loath them?
This is a 'new' owners ride. He took the car out of the body shop especially to come along to the show. What a lovely clean example of a Spec 1 GTST.
You can see our bonnets are still undone as we waited for the worlds longest passing shower to blow away.
Taken at the road services along the M25. I thought I better snap her in her glory as she may never look this good again!


Never really seen her with her lights on!

Becky's R34 this is undergoing body work shortly and will flare the rear arches for that GTR look. Interestingly all being well my current Hybrid turbo will be going into this car.
I had some abuse for my engine bay. Usual stuff like 'why bother, no one See's it' to 'I would spend the money on performance'. I just smile at them and wonder why then are they taking photo's of it and what do they actually know about Ms Skylines performance.

Included because I could...
See other caption hehe
My Angry Bird Mascot. I even had a minor amount of abuse to there not being any reason to do this... But then is there a real burning reason I need the car in the first place?
Sexy bum?
I would have taken more of the MX5's as they had some really good examples. However the guys there were just too friendly and kept me chatting!
Parting shot :)
And that was Japbash 2011!